Starting a Lawn by Seed:
Preparation and Installation
- Measure off the area and figure the square footage (length x width).
- OPTIONAL STEP: Kill weeds and grass with a nonselective herbicide (Kleen-up); however, seeding will have to be delayed approximately 7 to 10 days after application of such products. Be sure you are not using a total vegetative killer.
- Rototill the area and remove all debris – stone, roots, and weeds – which could possibly interfere with the development of the grass seed. Also, get a pH test of the soil.
- Rough grade – rake and remove any debris while producing a reasonably level area (no low spots) on which to lay the seed.
- Incorporate into the soil all amendments needed to ensure the germination of the grass seed.
- Organic Matter – Compost, manure, and/or peat moss have high organic content which will help the soil structure, increase the water holding capacity and increase the microbial activity. We recommend Coast of Maine Bumper Crop.
- Lime – MAG-I-CAL or Pelletized Lime (based on pH results)
- Love your Soil by Jonathan Green – great for heavy, compacted soils.
- Starter Fertilizer – High in phosphorous, essential for root development.
- JG Crabgrass Preventer plus New Seeding Fertilizer could be used to prevent crabgrass seed from germinating.
- Fine Grade – At this time the grade needs to be level. There should be no question about which direction the water will drain.
- Roll the area with a lawn roller approximately ¾ full of water.
- Water the ground lightly. If puddles occur, remove soil from high areas to fill in low spots.
- Spread your grass seed mixture evenly throughout the area. Consult one of our experts concerning which blend would be best for your yard.
- Roll the area lightly (empty tank) after spreading seed to help bed it into the soil.
- Moisten the entire area and apply EZ Straw, Lucerne Straw, Penn Mulch or Green Mulch over the area to help hold moisture in. This will increase the germination percentage of the seed.
- Note – If your lawn has had insect problems, like grubs, you apply an insecticide the same day you seed. Refer to one of our lawn experts for more information about products available.
- Basic maintenance of your newly seeded lawn:
- Water is the most important factor in establishing your new lawn. Moisten the soil but do not over water and create puddles. Depending on the weather, you may have to water several times per day to prevent soil from drying out.
- The seeds will germinate and begin to sprout in about 7 to 14 days. Do not walk on or allow pets on any seeded area during this initial phase of growth.
- After approximately 10-14 days you can remove the straw or when you cut the lawn for the first time it will be removed through that process.
- Mowing of your new lawn should begin when the grass reaches 2 ½ -3”. You should mow your lawn throughout the growing season, removing the top third each time.
- To ensure a dense, problem free lawn use fertilizer and insect controls as necessary and consult with one of our turf experts.
Installing a New Lawn with Sod:
Preparing the Soil
- Rototill or spade the soil to a depth of 4″.
- Remove sticks, stones, roots and other debris.
- Take soil test samples done for pH and nutrient levels.
- In accordance with soil test, mix lime and complete fertilizer into the soil.
- Smooth the soil by raking.
- Firm the soil by lightly rolling. Fill in any low spots.
Measuring and Ordering Sod
- Multiply the length times the width. This gives you your total square footage to order. Suggestion: Add 5% to the total for irregular shapes.
- Take delivery on the day you plan to start laying your sod. Install day of delivery.
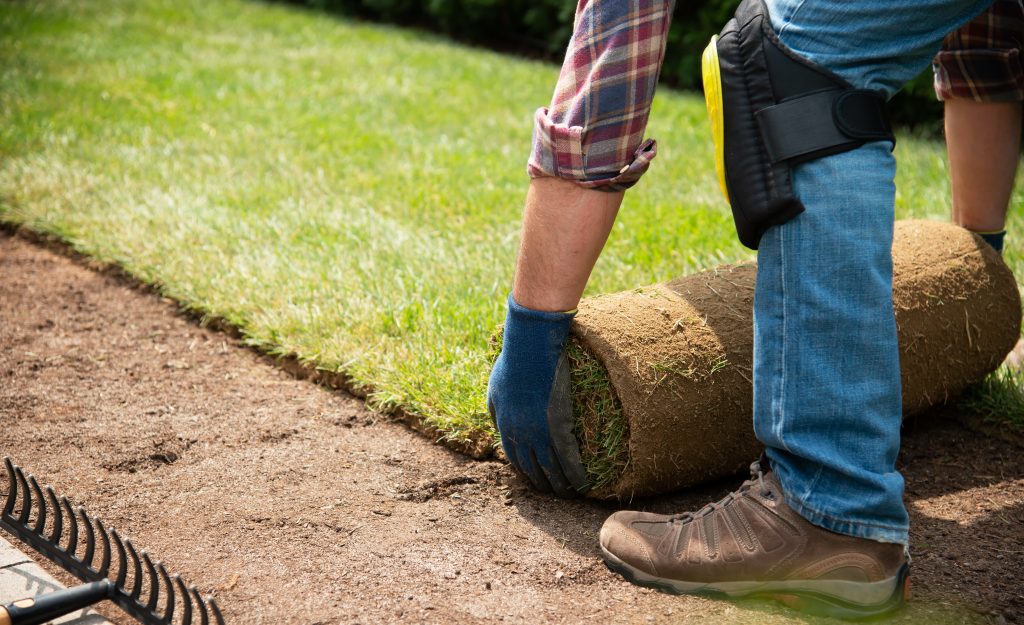
Laying Your Quality Sod
- Start at a straight line such as a driveway or walk.
- Lay out the sod as you would a rug or tiles.
- Make sure all joints are butted tightly together – without overlapping or spaces between strips of sod.
- Stagger the joints in each row like rows of bricks.
- Use a large sharp knife for shaping sod around trees, at flower beds or along borders.
- Completely soak the sod with at least 1″ of water. Start watering 20 minutes after the first strip is laid.
- Roll the sod to smooth out small bumps and air pockets. This will assure good contact with the soil.
Watering Schedule
- To gauge watering, simply place an empty can about 6″ away from sprinkler.
- When there is an inch of water in the can, it is time to move the sprinkler to the next area.
- Reflected heat along buildings dries sod quickly; be sure to water such areas more often.
| 1st Week | WATER | WATER | WATER | WATER | MOW | ||
| 2nd Week | WATER | WATER | WATER | MOW | |||
| 3rd Week | WATER | WATER | MOW |
Please note to take into consideration current weather conditions when watering newly installed sod. Too much as well as too little water can prevent the sod from developing new roots. This chart is only a guide.
When to Mow:
- Your new living lawn may need to be mowed as soon as 1 week after installation or as the roots begin to establish.
- Your basic mowing rule is never to remove more than 1/3 of the leaf blade during a single mowing.
- Mow when grass height reaches 2 1/3″-3″ and maintain at that height.
5. For best appearance, be sure to keep your mower blades sharp.
Traffic Caution
- Use your new sodded lawn sparingly until good root establishment has taken place – 2-3 weeks.
- Avoid concentrated play activities, dog traffic, or similar rough usage for at least four weeks. There are no restrictions on visually enjoying your lawn!