From Polyor.com
By Steven Schrenk
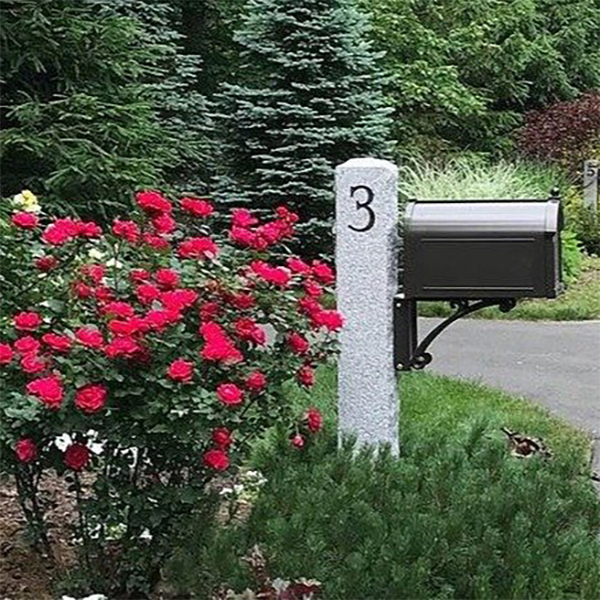
If your next project includes installing granite posts for lighting or a mailbox, you’ve picked a quick project that will add instant curb appeal.
Before you get started you’ll need to know the best and safest way to get that hole dug and the new granite post installed.
While this might seem like a fairly straightforward task — grab shovel, start digging — it actually requires a little pre-planning. You’ll want to make sure there are no obstacles underground and that the hole you prepare is a narrow, straight and deep cut into the earth at a particular size. You may also want to purchase gravel to backfill the hole.
Before digging holes for granite posts, there are a number of things to keep in mind that will help inform whether it’s a job you can do yourself or something you’d rather hire a contractor to perform.
Know what’s below
Prior to digging any holes in your yard, you’ll want to ensure there are no utility lines — like water, electricity or natural gas — running below the surface. There are more than 100 billion feet of underground utilities in the United States and most are lying just inches below ground, which results in a utility being damaged every nine minutes due to lack of preparation. Hitting a line can knock out service to your home and neighborhood or result in fines, damage and serious injury.
To avoid potentially dangerous and damaging outcomes from accidentally hitting a utility line, call 811 a few days before you plan to get to work. The service will arrange to have a crew come out to mark out utility lines around the site where you plan to dig. Each state has its own 811 call center and operators can contact local utility companies to send a locator to mark the approximate location of your underground utility lines at no charge. Because erosion and root system growth can alter the depth or location of buried lines, you need to call 811 every time you plan to dig a hole on your property.
The digging process
The first step in the digging process is making sure you have the proper equipment on hand. While post hole diggers, shovels, augers and mini-excavators can be used, most small post jobs will require a basic pointed shovel.
Once you’ve got your tools in place, the rest of the digging process can be broken into four steps:
- Begin by cutting a square or round area of appropriate size out of the sod or loam with a sharp spade or lawn edger and use a shovel or post hole digger to excavate the hole until it is deep enough to set the post at the correct height.
- Make sure the hole is deep enough to submerge the approximate bottom third of the post below ground. The ideal diameter should measure three times the width of the post.
- Pile the excavated material near the hole for compaction after the post is set into the ground. Depending on the amount and size of rocks you pull from the hole, you may need to obtain additional clean gravel to refill the hole. (We recommend using gravel to fill the hole rather than concrete. More on that later.)
- For a mailbox post, check with your local post office to confirm their requirements for the height of the box, as well as distance from the street that the post needs to be installed. Each individual postal office may have varying regulations.
Typical U.S. Postal regulations require the height from the street level to the bottom of the installed mailbox to be approximately 40” to 44”. A stock-size 7” x 7” x 7’-0” granite post would need a hole 30” deep, and 18” in diameter.
Remember to take into consideration the height of any street curbing as well. Add the curb height to the overall depth of the hole if there is existing curbing at the street. For example, if the height of the curb is 6”, the hole needs to be 36” deep as opposed to 30” in order to keep the mailbox at the proper height.
Setting the granite post
While you can set a post in concrete, gravel is easily permeable, drains well and provides strong reinforcement. When setting the post, you should bury approximately one-third of it underground.
If you have very loose, sandy soil, concrete might be the better method for setting the post. Some contractors prefer setting posts in concrete to prevent shifting, although there is a risk of the post snapping if struck by a vehicle or utility equipment, especially during the winter months when plows are out. Gravel will allow the post to shift and provides an opportunity to adjust it afterward should any accidental impacts occur.
When you begin refilling the hole around the post, be sure to compact in layers after every four inches of gravel shoveled into the hole. Trying to compact too deep of a layer at one time will not allow for proper compaction, and you might end up with voids along the way, causing settling and leaning over time.
Space will likely be very tight around the post toward the bottom of the hole, requiring you to use the narrow handle end of a shovel, or 2×4 to compact the gravel at the start. A long-handled sledge hammer can help to compact as you move along, since the hammer head is small and heavy. Above all, use a 48” long level to be sure your post remains true throughout the compaction process. It is nearly impossible to adjust for level once the hole is backfilled and proper compaction is completed.
The top four-inch layer of compaction should be the loam you excavated at the start, allowing you to seed, replace sod and plant flowers at the end.
Despite best-laid plans, it’s important to be prepared for the unexpected. There is always the possibility that you could run into large stones, boulders, or ledge, and utility, gas or irrigation lines, requiring you to relocate the granite post.
With a little planning, the right tools and some flexibility, installing a granite post will add value and curb appeal to your property, whether you choose to do it yourself or hire a contractor for the job.
For Polycor’s post installation guide, please click here!